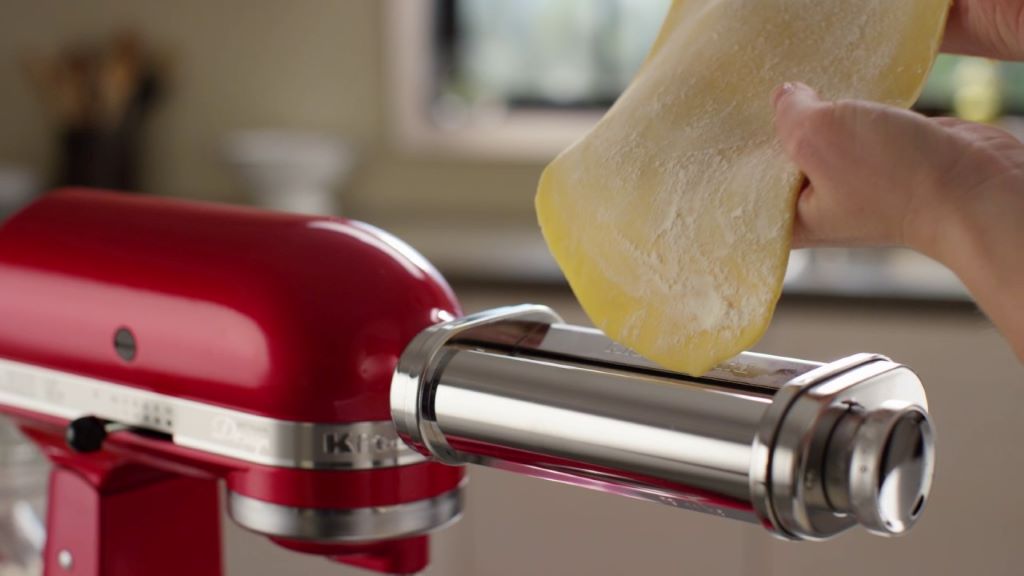
How to Adjust Pasta Machine Rollers for Different Dough Thicknesses
Try these things to get more from your lunch break
January 22, 2025
Exercise Rope Workouts for Metabolic Conditioning That Boost Strength and Burn Fat
January 23, 2025Making homemade pasta is one of life’s simple pleasures, but achieving the perfect dough thickness can be tricky without understanding your pasta machine. Whether you’re making delicate angel hair pasta, hearty lasagna sheets, or stuffed ravioli, knowing how to properly adjust your pasta machine rollers is essential to getting it just right. This guide will show you how to fine-tune your rollers for various pasta types and elevate your pasta-making experience.
When it comes to consistency, there’s more to the process than just running your dough through the machine. Factors like the type of flour, moisture content, and rest time all play a role in how the rollers interact with the dough. By learning step-by-step techniques and adjustments, you can ensure your pasta is always smooth, evenly rolled, and ready to impress. Oh, and if you’re just starting out or need tools to simplify pasta-making, explore Smartpastamaker.
Table of Contents
ToggleWhy Adjusting Pasta Machine Rollers Is Crucial
Adjusting your pasta machine rollers correctly can mean the difference between perfectly rolled dough and a frustrating, sticky mess. Each pasta dish requires its own specific dough thickness. For instance, ravioli sheets must be thin enough to seal properly, while lasagna sheets should be thicker to provide structure.
When the rollers are not adjusted properly, you risk uneven cooking, dough tearing, or poor texture in the final dish. Getting this adjustment right isn’t just a skill—it’s an art that, once mastered, will transform your pasta dishes from good to exceptional.
Troubleshooting: What to Do When Your Pasta Dough Isn’t Springy
If you find that your pasta dough not springy, it’s a sign that something’s off with your dough’s elasticity. This issue often stems from one of three main causes: insufficient kneading, incorrect flour-to-water ratio, or improper resting time.
Kneading develops gluten, which gives the dough its elasticity and ability to stretch without tearing. If the dough hasn’t been kneaded enough, it will feel stiff and may break apart when passed through the rollers. Conversely, over-kneading can make the dough too tight and brittle.
Additionally, your choice of flour matters. Flours like “00” or semolina, which are high in protein, help create the right texture. If your dough is sticky or tears easily, revisit your recipe and ensure you’re using the right proportions. Also, don’t forget to let the dough rest—at least 30 minutes wrapped in plastic wrap—so the gluten can relax.
Step-by-Step Guide to Adjusting Pasta Machine Rollers for Different Dough Thicknesses

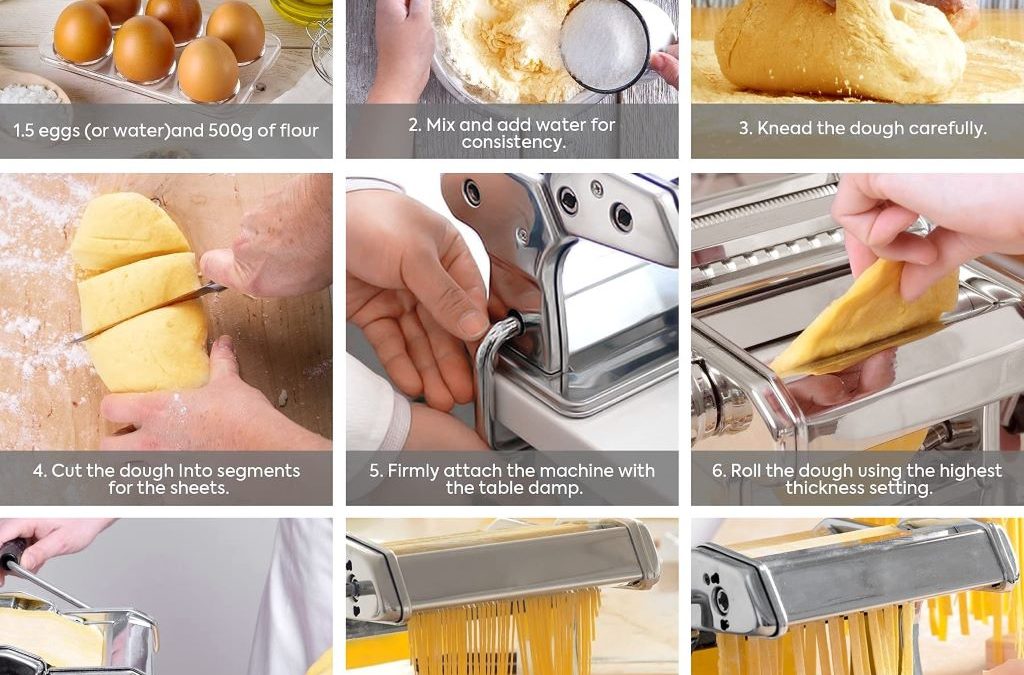
Step 1: Prepare the Dough Properly
The key to successful pasta lies in the dough preparation. Use high-quality flour like “00” or all-purpose flour mixed with semolina. Add eggs and water to create a firm but pliable dough. It should feel smooth, elastic, and slightly tacky to the touch.
Knead the dough for 8-10 minutes until it forms a cohesive, elastic ball. Cover the dough and let it rest for at least 30 minutes to allow the gluten to relax. This step is critical for making the dough easier to roll and less likely to tear during thinning.
Step 2: Start with the Widest Roller Setting
Set your pasta machine to the widest setting, often labeled as “0” or “1.” Divide your dough into smaller portions to make it manageable, then flatten each piece into a rectangular shape using your hands.
Feed the dough through the rollers, holding it taut as it exits the machine. This first pass helps flatten the dough evenly and prepares it for thinner settings. Dust the dough lightly with flour if it feels sticky, but avoid over-flouring, as this can dry it out.
Step 3: Gradually Decrease the Thickness Setting
After the first pass, fold the dough in half and run it through the rollers again on the same setting. This technique strengthens the gluten network and ensures an even texture. Repeat this step 2–3 times before moving to a thinner setting.
Turn the adjustment dial to the next number (e.g., from “1” to “2”), which will bring the rollers slightly closer together. Run the dough through without folding it this time. Repeat this process, reducing the thickness incrementally, until you achieve the desired thickness for your pasta type.
Step 4: Match Thickness to Pasta Type
Each pasta style has an ideal thickness that complements its texture and cooking requirements. Here’s a quick guide:
- Lasagna Sheets: Thick setting (approx. 1–2 mm)
- Fettuccine or Tagliatelle: Medium setting (approx. 3–4 mm)
- Ravioli: Thin sheets (approx. 5–6 mm) for easy sealing
- Angel Hair or Capellini: Thinnest setting (approx. 7–8 mm)
Test your settings with small portions of dough and make adjustments as needed. Remember, it’s always better to go slow and steady than to rush through the process.
Step 5: Maintain Dough Elasticity
Rolling thin sheets can sometimes cause tearing if the dough becomes too dry or overstretched. To avoid this, let the dough rest for 5–10 minutes between passes through the rollers.
Dust lightly with flour to prevent sticking but avoid using too much, as this can make the dough brittle. If you notice the dough cracking, fold it in half, let it rest, and try again at a slightly wider setting.
Tips for Consistent Results
- Always start with the widest setting and work your way down gradually.
- Roll the dough in one direction for even thickness.
- Use consistent pressure when feeding the dough through the rollers.
Pasta Machine Maintenance: Why It Matters
A well-maintained pasta machine ensures smoother rolling and extends the life of your equipment. After each use, clean the rollers with a soft brush or dry cloth to remove flour and dough residue. Avoid water, as it can cause rust.
Regularly oil the machine’s moving parts to keep it running smoothly. Store your pasta machine in a cool, dry place to prevent damage and corrosion.
Frequently Asked Questions
What is the best thickness for ravioli dough?
Ravioli dough should be rolled to about 5–6 mm, thin enough to seal properly without breaking during cooking.
How can I prevent my dough from sticking to the rollers?
Lightly dust the dough and rollers with flour. If the dough is too wet, adjust its hydration before rolling.
Why does my dough tear when rolling?
Tearing often occurs if the dough hasn’t rested enough or if it’s too dry. Allow the dough to relax and add a few drops of water if necessary.
Can I use gluten-free dough in a pasta machine?
Yes, but gluten-free dough is more fragile. Handle it gently and roll it slowly, starting with wider settings.
How do I know when the dough is ready for rolling?
The dough is ready when it’s smooth, elastic, and slightly tacky. It should not stick excessively to your hands or work surface.
How often should I clean my pasta machine?
Clean your pasta machine after every use to prevent dough buildup. Use a soft brush or dry cloth, and avoid using water to clean the rollers.
You Might Enjoy: How to make evaporated milk
Conclusion
Mastering how to adjust pasta machine rollers for different dough thicknesses is an essential skill for any pasta enthusiast. With practice, patience, and the right techniques, you’ll be able to create pasta sheets that are perfectly suited for everything from lasagna to ravioli.
Warning: Trying to access array offset on value of type null in /home/speakyma/public_html/checkyourhud.com/wp-content/themes/betheme/includes/content-single.php on line 286

