
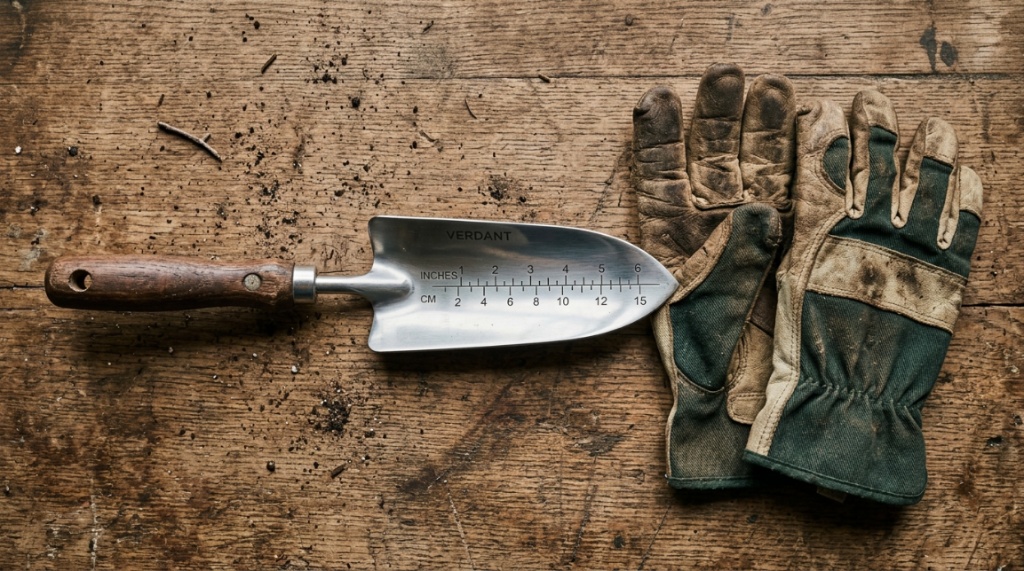
Texas soil is a tale of two extremes—either it’s the dense, black gumbo that turns to concrete when dry, or the loose, sandy loam that drains faster than a roadside ditch after a flash flood. If you’ve ever spent a hot Saturday wrestling with a trowel just to get a tiny tomato seedling into the ground, you know the real problem isn’t your gardening skills. It’s your tool. That’s why finding the best transplanter for Texas gardens isn’t about convenience—it’s about necessity. Whether you’re planting spring peppers in Lubbock or fall pansies in Houston, the right transplanter saves your back, your time, and your plants. This guide breaks down exactly what to look for, what to avoid, and how to match the tool to your specific Texas soil conditions.
What Makes Texas Soil So Tough on Transplanters?
The short answer: texture and density. Texas is home to over 1,300 soil types, but most gardeners deal with one of three—clay, sand, or caliche. A transplanter that glides through garden soil in Ohio will bounce off the hardpan in Central Texas.
Understanding Clay Soil’s Resistance
Clay particles pack tightly, leaving little room for air or water. When wet, it’s slick and sticky; when dry, it’s rock-hard. A standard narrow trowel will bend or snap under pressure. You need a transplanter with a wide, sharp blade that can slice through the clay’s structural bonds without requiring you to lean your full body weight on the handle.
The Slippery Challenge of Sandy Soil
While sand is easier to penetrate, it constantly collapses back into the hole. A transplanter with a solid, cupped design helps scoop out the sand and hold it long enough to insert the root ball. If the tool has too many open slots, sand will pour through like an hourglass, making it useless.
Caliche: The Hidden Nightmare
Found mostly in the Hill Country and West Texas, caliche is a cemented layer of calcium carbonate that looks like white chalk. It’s almost impossible to dig through with hand tools. If you have caliche, you don’t need a transplanter—you need a pickaxe first. However, for small planting holes in areas where caliche is fragmented, a sturdy, sharp-pointed transplanter can chip away at the edges.
What Features Should You Prioritize for Texas Conditions?
Look for three non-negotiables: blade thickness, handle ergonomics, and overall length. Cheap tools with thin gauge metal will fail within one season.
Blade Material and Thickness
Stainless steel is ideal because it resists rust and holds a sharp edge. However, carbon steel is stronger but requires drying after each use. Avoid aluminum—it’s too soft. The blade should be at least 2-3 mm thick to handle rocky or dense soil without flexing.
Handle Design That Saves Your Wrist
Straight handles transfer shock directly to your palm and wrist. Opt for a D-shaped or T-shaped handle. This gives you better leverage and lets you rotate the tool with control, which is critical when planting in tight rows.
Length and Leverage
Short hand trowels force you to kneel. A long-handled transplanter (36-48 inches) lets you stand upright, which is a game-changer for gardeners with back pain. For deep-rooted transplants like tomatoes or peppers, you need at least a 10-inch blade to reach the necessary soil depth.
Which Type of Transplanter Works Best?
It depends on your planting style. There are four main categories: hand trowels, stand-up transplanters, bulb planters, and transplanting spades. Each has a specific sweet spot.
Hand Trowel: The Classic Choice
Best for containers, raised beds, and soft ground. It offers maximum control but sacrifices leverage. The best transplanter for Texas gardens in this category has a serrated edge on one side for cutting through small roots and a depth gauge on the blade.
Stand-Up Transplanter: The Back Saver
This tool features a long handle and a footstep on the blade. You push it into the ground with your foot, then pull it back to create a hole. Ideal for clay soil because it uses your body weight instead of arm strength. Look for one with a replaceable blade.
Bulb Planter: For Single Holes
These cylindrical tools extract a core of soil. They work poorly in clay because the core gets stuck inside the cylinder. However, they are excellent for planting bulbs or seedlings in sandy soil areas like East Texas.
Transplanting Spade: The Heavy Duty Option
It’s a narrow spade with a long, tapered blade. This is the go-to for breaking through tough, compacted soil. It can handle caliche fragments and is perfect for planting larger shrubs or trees.
How Deep Should a Transplanter Dig for Texas Vegetables?
For most Texas vegetables, the transplant hole should be slightly deeper than the root ball, typically 4-6 inches. However, tomatoes need deeper planting—8-10 inches—because they root along the stem.
Depth Adjustments for Extreme Heat
In the intense Texas summer, planting slightly deeper helps roots access cooler, moisture-retentive soil. A transplanter with a depth gauge helps you stay consistent. Many gardeners in the Rio Grande Valley plant peppers 2-3 inches deeper than the pot level to protect them from the scorching surface heat.
How to Test the Depth in the Field
Insert the transplanter into the ground, remove it, and measure the hole with a ruler. Adjust the angle of your tool—a more vertical insertion creates a deeper hole, while a tilted angle results in a shallower one. Over time, you’ll develop the muscle memory for your specific crops.
Why Do Sharp Edges Matter More Than You Think?
Dull blades tear the soil, which damages the surrounding dirt structure and creates air pockets around the roots. A sharp blade cuts cleanly, preserving the soil’s integrity and making transplant establishment faster.
The Science Behind a Clean Cut
When you push a dull blade into the ground, it compresses the soil at the edges. This compression reduces porosity, which slows oxygen exchange and water infiltration. A sharp, polished edge slides between soil particles, minimizing disturbance and encouraging root penetration beyond the hole.
Sharpening Tips for DIY Gardeners
Use a flat mill file and hold the blade at a 20-degree angle. File in one direction, not back and forth. Three or four passes per edge should restore its edge. For stainless steel, use a honing stone instead, as it creates a smoother edge. Do this every 2-3 weeks during peak planting season.
Can a Transplanter Help With Texas’s Heavy Rainfall?
Yes, surprisingly. After a downpour, soil becomes oversaturated and sticky. A transplanter allows you to create a planting hole without compressing the wet soil further. The key is to work quickly before the sun dries the surface into a crust.
Drainage Techniques with Your Tool
Use the transplanter to angle the hole slightly—this creates a small channel for excess water to drain away from the root zone. This trick is particularly effective for raised beds in Central Texas, where “gumbo” soil can become waterlogged for days.
Preventing Soil Compaction
Never twist the transplanter while it’s in the ground. This creates a burnished, slick wall in the hole, which roots struggle to penetrate. Instead, wiggle the tool gently front-to-back. This loosens the sides without destroying their structure.
How to Maintain Your Transplanter for Longevity
Texas heat, humidity, and alkaline soil can corrode tools quickly, but proper care extends their life for decades. Neglect is the main culprit for early rust and dulling.
Daily Cleaning Routine
After each use, knock off all dirt and rinse with a hose. Dry completely with a rag. If you’re done for the day, apply a thin coat of linseed oil to the metal part. For the handle, wipe with a dry cloth and check for splinters.
Seasonal Storage Tips
Before storing for the off-season (usually December to February), sand any rough spots on the handle, then treat it with boiled linseed oil. For the blade, use a rust-preventive spray or rub with a waxy cloth. Store the tool hanging—not on the floor—to prevent moisture buildup.
Are Expensive Transplanters Worth the Investment?
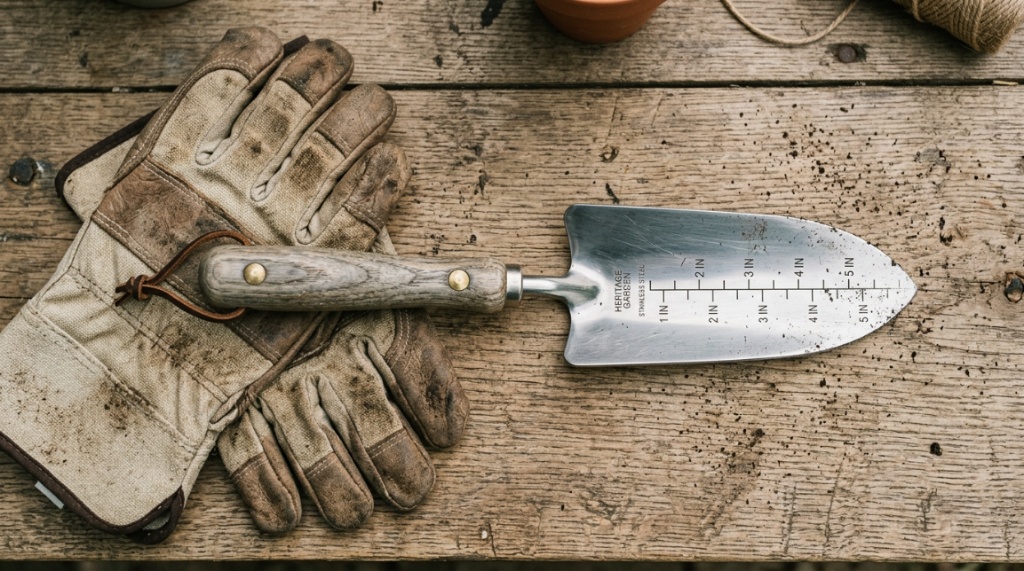
Generally, yes. A premium transplanter costs $50-$80, while budget models are $15-$25. Cheaper tools will likely bend, rust, or break within one to two Texas summers. High-end tools are made of forged steel with hardened edges.
Cost-Benefit Analysis for Home Gardeners
Think about the number of plants you set out each year. If it’s under 50, a mid-range tool is fine. If you’re starting hundreds of seedlings, the time saved with a superior tool is considerable. The extra cost pays for itself by preventing the need for repurchasing.
What About Ergonomic Features?
Some models offer shock-absorbing handles, angled grips, and spring-loaded mechanisms. These reduce joint strain, which is critical for older gardeners or those with arthritis. While not essential for young, agile individuals, they can make a significant difference in comfort.
What Are the Common Mistakes People Make With Transplanters?
The biggest mistake is using the tool like a lever to pry heavy rocks or roots. This can snap the handle or bend the blade permanently. Another error is inserting the tool at the wrong angle, creating holes that are too shallow or too narrow.
Misjudging Hole Width
The hole should be at least twice the width of the root ball. A narrow hole causes the roots to circle the hole and become root-bound. This stunts growth and makes the plant susceptible to transplant shock.
Forgetting to Water the Hole
Many Texas gardeners fail to pre-moisten the hole before planting. A transplanter creates the hole, but you need to add water to it and let it absorb before placing the plant. This ensures moisture reaches the roots immediately.
How to Choose the Right Size for Your Hand?
The handle should feel comfortable in your grip, with enough room for a gloved hand. If you wear gardening gloves, test the tool while wearing them—especially the finger grooves and grip padding.
Ergonomic Guidelines
For hand trowels, the handle length should be 4-5 inches, and the overall length around 12 inches. For larger tools, the handle diameter should be 1.25-1.5 inches. If the handle is too thick, you’ll lose grip strength; too thin, and you risk blisters.
Women and Smaller Hands
Traditional tools are often too heavy and too wide for women or smaller-framed individuals. Look for “ladies’ models” that feature a narrower blade and a smaller grip circumference. These are not gimmicks; they significantly improve control and reduce fatigue.
When Should You Replace Your Transplanter?
There’s no set timeline, but you should inspect your tool before each planting season. If the blade is worn down to less than half its original thickness, or if the handle has developed deep cracks, replace it immediately.
Signs of Dangerous Wear
Watch for metal fatigue—look for slight bends or wrinkles on the blade. These can snap suddenly mid-use and cause injury. Also, if the handle wobbles or rotates independently from the blade, the rivets are failing and the tool could easily break,Even if you select the toughest drought-resistant plants and dig the perfect holes, a Walled Garden is still needed to protect your young seedlings from the harsh Texas winds and local wildlife..
Upgrade Triggers
If you find yourself struggling to penetrate the soil, or if you’re consistently breaking cheap tools, it’s time to upgrade. The cost of a quality tool is justified by the safety and efficiency it brings.
Frequently Asked Questions
What is the best material for a transplanter blade in Texas?
Stainless steel is the best for most Texas soils. It resists rust, maintains a sharp edge, and can handle the abrasive nature of sandy and clay soils. Carbon steel is stronger but requires diligent upkeep to prevent rust in high-humidity areas.
Can I use a transplanter for planting flower bulbs in Texas?
Yes, but it’s not the most efficient tool. A dedicated bulb planter is better for extracting a clean soil core. However, in heavy clay, a transplanter with a wide blade can create a larger, more accessible hole for clusters of bulbs.
How do I sterilize my transplanter to prevent disease spread?
Wipe the blade with rubbing alcohol or a 10% bleach solution. Let it air dry. This is crucial if you’ve been working with infected plants. Repeat this after each use if you have a persistent soil-borne disease issue.
Is a long-handled transplanter better than a hand trowel?
For many Texas gardeners, yes. A long-handled transplanter reduces back strain and offers more leverage for breaking through hard soil. However, it’s less precise for small pots. The best choice depends on your physical condition and the scale of your planting.
Can I sharpen a serrated-edge transplanter?
Yes, you can. Use a small, round file or a sharpening rod. Run it between each tooth, working in one direction. This will maintain the cutting edge for slicing through small roots and tough sod.
How often should I oil the wooden handle?
Once a month during active use is sufficient. Apply a light coat of linseed oil and allow it to soak in. This prevents wood from drying out, cracking, and splintering under the hot Texas sun.
What transplanter is best for raised beds?
A hand trowel with a wide blade and a comfortable grip is best for raised beds. Since the soil is lighter and filled by you, you don’t need heavy leverage. Look for a tool that can cut into the soil without damaging the bed’s lining.
Conclusion: Your Next Step Toward Easier Planting
Selecting the right transplanter isn’t about buying the most expensive one—it’s about finding the one that works with your body and your soil. Whether you’re dealing with the sticky gumbo of the Gulf Coast or the rocky terrain of the Hill Country, the right tool will save you hours of work and dozens of failed seedlings. Prioritize sharp edges, solid material, and ergonomic handles. Think about your planting volume and your physical limitations. If you’re serious about your garden, view this purchase as an investment in your health and your harvest. Take the time to compare models, hold them in your hands, and test their weight. Your back and your vegetables will thank you for the effort. Now, get out there and plant something—the Texas sun isn’t waiting.


Leave a Reply