DIY Acoustic Treatment for a Home Studio

Best Travel Clothes for Every Adventure: A Complete Guide to Comfort, Style, and Functionality
July 9, 2025
How to Stay Technically Sharp in a Non-Technical Job
July 21, 2025
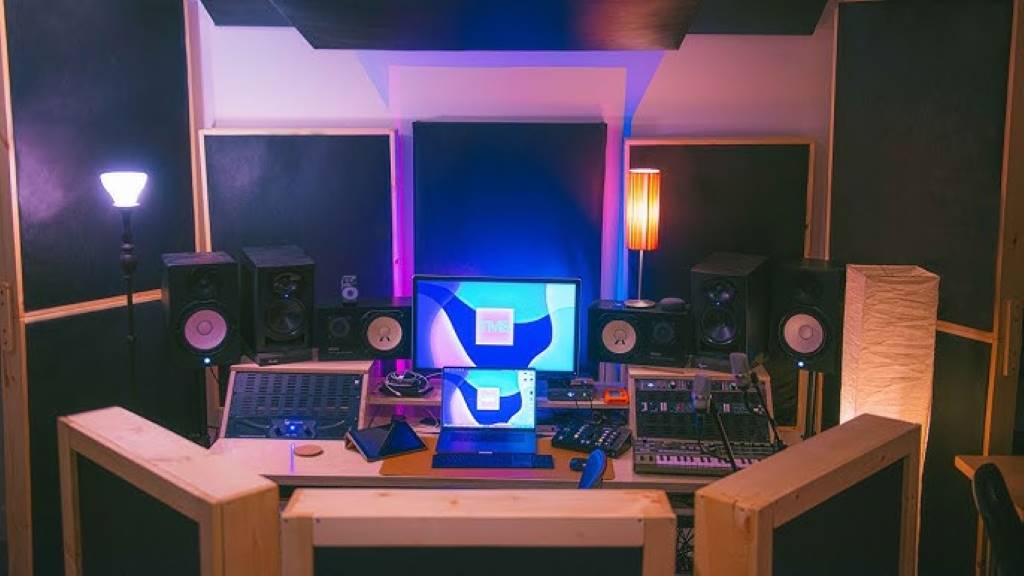
Creating a professional-quality home studio requires more than just high-end equipment; it demands a space optimized for sound clarity and precision. Acoustic treatment is essential to control sound reflections, reduce unwanted noise, and enhance recording quality. For musicians, podcasters, or content creators, a well-treated studio ensures recordings are crisp and free from distortion. Fortunately, you don’t need a massive budget to achieve this. With DIY acoustic treatment, you can transform your home studio into a sonic haven using affordable materials and practical techniques. For additional resources on optimizing your creative space, check out Bee Buze, a platform offering insights for music and entertainment enthusiasts.
Why Acoustic Treatment Matters
Sound waves bounce off walls, ceilings, and floors, creating echoes, reverb, or standing waves that can muddy your recordings. Untreated rooms often suffer from issues like bass buildup, flutter echoes, or uneven frequency response. Acoustic treatment addresses these problems by absorbing, diffusing, or redirecting sound waves. Unlike soundproofing, which blocks external noise, acoustic treatment focuses on improving the sound within the room. For example, if you’re recording music for a platform like the siriusxm music showcase plan, clear audio is critical to stand out in a competitive space. Proper treatment ensures your recordings capture the intended sound without unwanted artifacts.
Assessing Your Home Studio’s Needs
Before diving into DIY projects, evaluate your studio’s acoustic challenges. Start by identifying the room’s size, shape, and materials. Rectangular rooms, for instance, are prone to standing waves, while small spaces may amplify bass frequencies. Clap your hands in the room and listen for echoes or ringing sounds. Additionally, consider your studio’s purpose—music production, podcasting, or voiceovers—since each requires specific acoustic solutions. For music production, bass control is crucial, whereas podcasting prioritizes vocal clarity.
To get a clearer picture, use free audio analysis tools like Room EQ Wizard (REW). This software measures your room’s frequency response, helping you pinpoint problem areas. Once you understand your space, you can prioritize treatments like bass traps, absorption panels, or diffusers.
DIY Acoustic Treatment Solutions
With a plan in place, you can start building cost-effective acoustic treatments. Below are practical DIY projects to enhance your studio’s sound quality.
1. DIY Acoustic Panels
Acoustic panels absorb mid-to-high-frequency reflections, reducing echo and reverb. They’re ideal for walls and ceilings in small to medium-sized studios.
- Materials: Rigid fiberglass (like Owens Corning 703), wooden frames, breathable fabric (e.g., burlap or muslin), nails, and staples.
- Steps: Build a wooden frame (2×4 inches) to fit your panel size, typically 2×4 feet. Place fiberglass inside the frame, ensuring it’s snug. Cover with fabric, pulling it taut, and staple it to the back. Hang panels on walls at ear level, focusing on reflection points (use the mirror trick: place a mirror on the wall and mark where you see your speakers’ reflection from your listening position).
- Cost: Around $20–$30 per panel.
- Tip: Space panels 2–4 inches from the wall for better low-frequency absorption.
2. Bass Traps
Bass frequencies accumulate in room corners, causing muddy sound. They target these low frequencies.
- Materials: Rigid fiberglass or rockwool, wooden frames, fabric, and corner brackets.
- Steps: Create triangular frames to fit room corners (floor-to-ceiling or wall-to-wall). Fill with dense fiberglass or rockwool, cover with fabric, and secure in corners. For maximum effect, stack multiple layers of material in high-problem areas.
- Cost: $30–$50 per trap.
- Tip: Prioritize corners near your speakers or listening position.
3. DIY Diffusers
Diffusers scatter sound waves to prevent harsh reflections without over-deadening the room. They’re ideal for larger studios or live rooms.
- Materials: Wooden blocks, foam, or PVC pipes cut into varying lengths.
- Steps: Design a pattern based on quadratic residue diffuser (QRD) calculations. Arrange blocks or pipes in a sequence to scatter sound evenly. Mount on rear walls or ceilings.
- Cost: $50–$100, depending on materials.
- Tip: Diffusers work best in rooms larger than 12×12 feet; smaller rooms benefit more from absorption.
4. Ceiling Clouds
Ceiling reflections can interfere with your mix. They absorb overhead sound and improve clarity.
- Materials: Fiberglass or rockwool, wooden frames, fabric, and hanging hardware.
- Steps: Build a frame similar to acoustic panels, fill with absorbent material, and cover with fabric. Suspend from the ceiling using hooks or chains, positioning above your listening area.
- Cost: $40–$60 per cloud.
- Tip: Angle clouds slightly for better sound dispersion.
Read Also:
Music for the business of truckers
Best ways to listen to music on your mobile phone
Placement Tips for Optimal Results
Strategic placement is key to effective acoustic treatment. First, identify your room’s primary reflection points using the mirror trick mentioned earlier. Place acoustic panels at these points on side walls, behind speakers, and on the rear wall. Bass traps should occupy as many corners as possible, especially in the front of the room. Ceiling clouds work best above the mixing position. Additionally, ensure your listening position forms an equilateral triangle with your speakers (38% of the room’s length from the front wall is ideal). Avoid over-treating the room, as this can make it sound lifeless. Aim for a balance between absorption and diffusion.
Materials to Avoid
Not all materials are suitable for acoustic treatment. Common mistakes include using egg cartons, carpet, or thin foam, which are ineffective at absorbing low frequencies. Egg cartons, for example, are too thin to impact sound significantly and may pose fire hazards. Instead, opt for dense, porous materials like fiberglass, rockwool, or acoustic foam designed for sound absorption. Safety is also critical—use fire-rated materials and ensure proper ventilation when working with fiberglass.
Budget Considerations
DIY acoustic treatment is cost-effective compared to commercial solutions. A basic setup with four acoustic panels, two bass traps, and one ceiling cloud can cost $200–$300, while professional treatments may run thousands. To save further, source materials from hardware stores or repurpose items like moving blankets for temporary absorption. However, invest in quality materials for long-term durability and performance.
Testing and Fine-Tuning
After installing treatments, test your studio’s sound. Record a sample track or use REW to measure improvements in frequency response. Listen for clarity, reduced echo, and balanced bass. If issues persist, add more panels or reposition existing ones. Fine-tuning is an iterative process, so be patient and adjust based on your recordings’ needs.
Maintaining Your DIY Treatments
DIY acoustic treatments require minimal upkeep. Dust panels and clouds periodically with a vacuum or damp cloth. Check for fabric wear or loose frames, especially in high-traffic areas. If you move your studio, most DIY treatments are portable and can be reinstalled with minimal effort.
FAQs
1. How much acoustic treatment do I need for a small home studio?
For a small studio (10×10 feet), start with four acoustic panels at reflection points, two bass traps in front corners, and one ceiling cloud. Adjust based on testing.
2. Can I use household items like curtains for acoustic treatment?
Curtains can reduce minor high-frequency reflections but are ineffective for low frequencies. Use dense materials like fiberglass for better results.
3. How do I know if my room is over-treated?
An over-treated room sounds dull or lifeless. If vocals or instruments lack natural brightness, remove some absorption panels or add diffusers.
4. Are DIY acoustic treatments as effective as commercial ones?
Yes, if built with quality materials like fiberglass or rockwool and placed correctly. DIY solutions can rival commercial products at a fraction of the cost.
5. How long does it take to build DIY acoustic panels?
A single panel takes 1–2 hours to construct, depending on experience. A full studio setup (6–8 panels, traps, and clouds) may take a weekend.
Conclusion
DIY acoustic treatment is an accessible and effective way to elevate your home studio’s sound quality. By understanding your room’s acoustic challenges and using affordable materials like fiberglass, rockwool, and fabric, you can create professional-grade recordings without breaking the bank. Start small with acoustic panels and bass traps, test your setup, and fine-tune as needed. With patience and creativity, your home studio can produce clear, vibrant audio for music, podcasts, or any creative project. Invest time in acoustic treatment, and your recordings will thank you.

